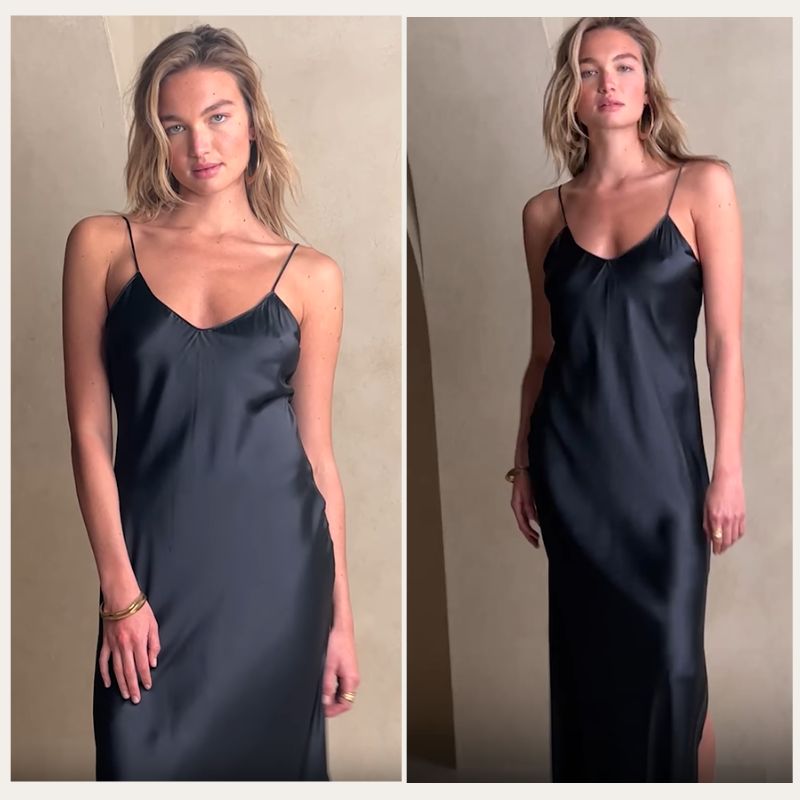
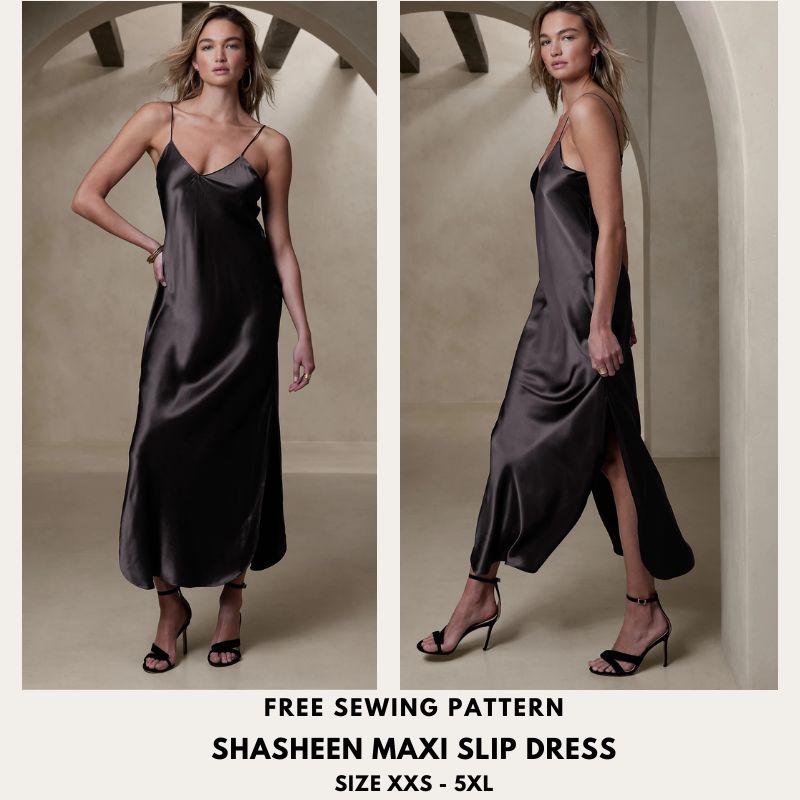
The Shasheen maxi slip dress features spaghetti straps, slit sides and curved shirttail. With its flowing silhouette and lightweight fabric, the Shasheen maxi slip dress gracefully skims the body, creating a flattering and feminine look. This maxi slip dress can be styled in many ways:
– Effortlessly Elegant: Wear the maxi slip dress on its own with minimal accessories for a chic and elegant look. Pair it with strappy sandals or heels, and add a delicate necklace or a stack of bracelets for a touch of sophistication. This simple yet stylish outfit is perfect for a summer garden party or a dinner date.

– Layered with a Denim Jacket: Add a casual and edgy vibe to your maxi slip dress by layering it with a denim jacket. This combination creates a great contrast between the feminine slip dress and the rugged denim. Complete the look with ankle boots or sneakers, and accessorize with a wide-brimmed hat or a crossbody bag for a cool and laid-back ensemble.
– Bohemian Vibes: Embrace a bohemian-inspired style by pairing your maxi slip dress with a floppy hat, a fringed bag, and flat sandals. Consider adding a chunky belt around the waist to define your silhouette and create a boho-chic look. This ensemble is perfect for a music festival, a beach outing, or a summer picnic.
– Layered with a T-Shirt: For a trendy and youthful look, layer a basic white or graphic t-shirt underneath your maxi slip dress. This creates a playful and casual outfit that can be paired with sneakers or platform sandals. You can also experiment with knotting the t-shirt at the waist for a more defined silhouette.
– Belted and Structured: Add some structure and definition to your maxi slip dress by cinching it at the waist with a belt. Choose a belt that complements the color or pattern of your dress and experiment with different styles such as wide or skinny belts. This styling technique creates a more polished and put-together look suitable for formal occasions or daytime events.
– Dressed Up with a Blazer: For a sophisticated and polished outfit, layer a tailored blazer over your maxi slip dress. Opt for a blazer in a contrasting color to make a statement or choose a neutral shade for a more classic look. Finish the ensemble with heels and minimal jewelry for a chic and modern outfit suitable for a business meeting or a semi-formal event.
As usual, my pattern is made in 10 sizes from XXS to 5XL so you may find a suitable size for yourself. If you are not sure which size suits you, take a look at the measurement table before doing anything here: SIZE GUIDE.
The pattern is made using layered PDF, please check for your desired size before printing so you won’t waste your paper. I have included a first page with many details about sizing and printing, so please first read the first page and make sure you know what size you need! If you still do not know how to print a layered PDF, please check for the printing instruction in this post: PRINTING GUIDE.
My patterns are now made in both A4/Letter paper and A0 paper format so you can print at home or at any print shop!
For home printers, you can print this using your home printer and either A4 or Letter paper. I calculated the printing area so that you will be able to use either type of paper to print the pattern out perfectly. Always print the first page first and check with the test square if you are printing at the right scale before you print out the whole pattern – avoid waste of ink and waste of paper, save the earth!
Some PC may print smaller than actual size even when you choose 100% scale – I don’t know why this problem exist, but my HP laptop cannot print true to size. I have to scale up to 103% to get the right size. You may need to check with your PC to see if it prints true to size, if not, scale up a bit. I was informed by a reader that you can also print the pdf as image to get the right scale, however I never tested it on my computer.
SEWING INSTRUCTION
Sewing a bias-cut slip dress can be a bit challenging due to the nature of the fabric and the way it drapes on the body. Here are some tips to help you sew a bias-cut slip dress successfully:
– Choosing the right fabric: Opt for a fabric with a nice drape, such as silk, satin, or rayon, as these fabrics work well for bias cuts. It’s important to choose a fabric that has a bit of weight to it, as very lightweight fabrics may be more difficult to handle.
– Cutting the fabric: When cutting the fabric on the bias, it’s crucial to be precise. Lay the fabric flat, aligning the selvage edges, and use a large cutting mat and rotary cutter for accuracy. Make sure to mark your pattern pieces clearly.
– Handling the fabric: Bias-cut fabric is more prone to stretching and distorting. Take care when handling the fabric to avoid excessive pulling or stretching, as it can result in uneven seams and an ill-fitting garment. Support the fabric as much as possible while cutting and sewing.
– Stay stitching: Since bias-cut fabric stretches easily, it’s beneficial to stay stitch the curved or angled areas of your pattern pieces before sewing. This involves sewing a row of stitches just inside the seam allowance to stabilize the fabric and prevent stretching.
– Seam finishes: Consider using French seams or flat-felled seams to neatly finish the seams on a bias-cut slip dress. These seam finishes will enclose the raw edges and provide a clean and professional look.
– Hemming: Hemming a bias-cut garment can be a bit challenging due to the curved nature of the fabric. To achieve a smooth and even hem, try using bias tape as a facing or create a narrow rolled hem using a hemming foot or by hand. Take your time and press the hem carefully to maintain a beautiful drape.
You will need
- Fabric of your choice. This pattern is intended for woven fabric.
- Some bias tape
- Scissors, pencil or fabric marker, ruler, pins
- Sewing machine/Serger or needle and thread
- Printed pattern
How much fabric do you need for this piece of garment? To be precise, you may need to check how much fabric you need before buying. It will depend on the selected pattern size, the width, and design of the fabric you plan to use. Just to be sure, print all the paper patterns and lay them out at the width of fabric you plan to use (usually from 90 to 150 centimeters or 35 to 60 inches). Measure how much fabric you will need. Don’t forget to account for pieces that need to be cut multiple times and pieces that are cut on the fold.
Cutting instruction:
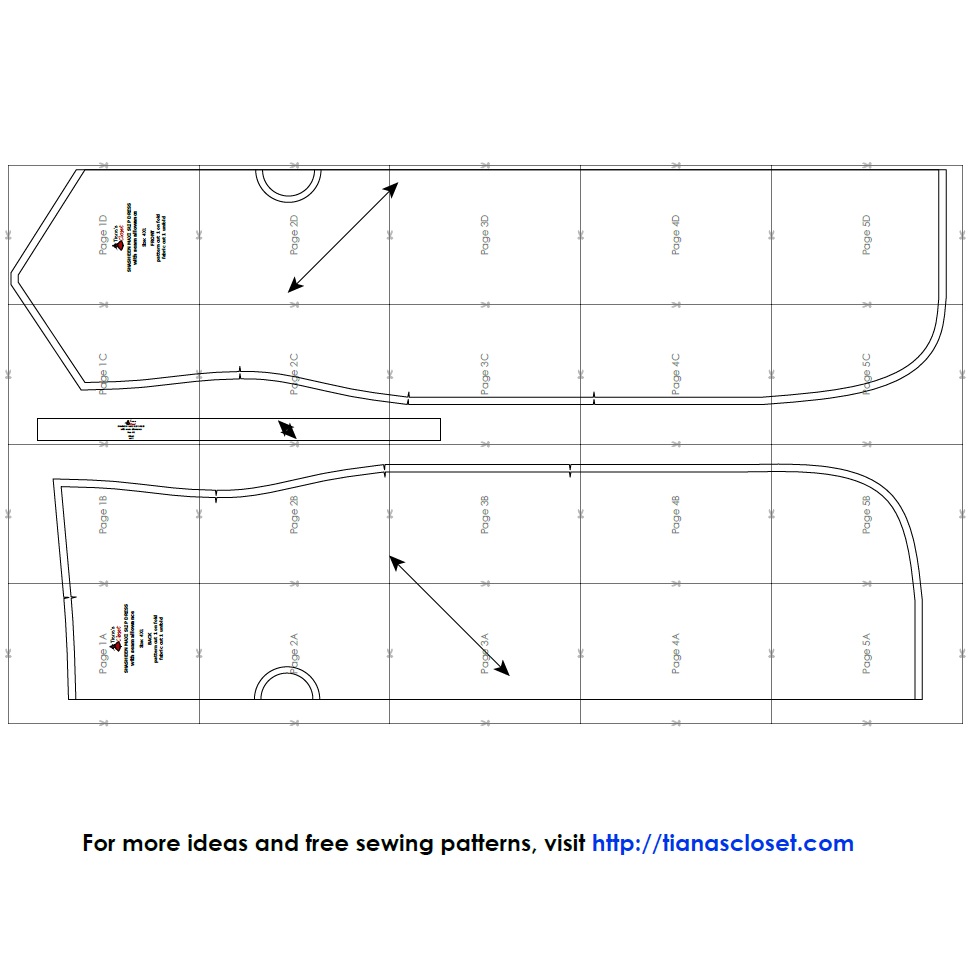
After printing out and taping all the pattern pages together, you will get something similar to this:

You will see that there are 2 sets of lines on each pattern piece. The inner lines are sewing line (and you sew along these lines), and the outer lines are cutting lines (you cut the fabric along these lines, remember the folding lines where you have to fold the fabric before cutting). The distance between sewing line and cutting line is seam allowance, and it varies from point to point. For example, the side seam allowance is about 1/2 inch (1.2cm), and seam allowance at hemline is 1 inch (2.5cm). This is the reason why I do not remove the sewing lines from the pattern. Please use it as a guide to know how much seam allowance you need to give at each seam.
The fabric will be cut into following pieces:
- Front: cut 1
- Back: cut 1
- Strap: cut 2
- Bias tape for binding neckline opening
Place the pattern pieces on the fabric, pin the pattern pieces to the fabric to secure them in place. Using sharp scissors, carefully cut out the fabric pieces along the outer lines of the pattern. Take your time to ensure precise and clean cuts, as this will affect the fit and overall appearance of your garment.
Make sure to mark all notches and other design features such as darts, pleats, draw marks etc. from the pattern pieces onto your fabric. When sewing the garment, pay attention to notches, they must match up.
Sewing instruction:
1. Serge/zig zag stitch the raw edge to prevent fabric from unraveling.
2. Place Front and Back right side facing, pin and sew side seams. Only sew from the top edge to the lowest notch on the side, leaving part of the side seam open.
3. Make spaghetti straps. You can refer to this post about How to make spaghetti straps/drawstrings.
4. Once you’ve sewn the straps, try them on the dress or a mannequin to check the length and adjust them if necessary. Make sure the straps are even in length. Cut off the excess strap length.
5. Place the strap on the notch at the back dress and sew it to the inside of the slip dress. Sew the other end to the front dress.
6. Use bias binding to finish the opening of the neckline.
7. Fold the hem of the slit sides and the bottom end of the dress. Sew to finish the garment.
And here is the download link:
SHASHEEN MAXI SLIP DRESS XXS – 5XL (A0 PAPER)
SHASHEEN MAXI SLIP DRESS XXS – 5XL (A4/LETTER PAPER)
To download just click on the link above and choose “Save link as”. The PDF file will be downloaded to your device. An advertisement may pop up, just close it and continue with your download. In case some ads attempt to make you enter your personal info, just ignore and close it. I do NOT require any kind of information to download my pattern files.
Happy sewing! And don’t forget to share your project on my Facebook page: Tiana’s Closet Sewing Patterns or tag me on Instagram #tianasclosetsewingpatterns, I will be thrilled to see the garment in real life!
Tiana


Pingback: 35+ Stunning DIY School Formal Dress Sewing Patterns for Unforgettable Proms and Weddings – Sewing
Pingback: 35+ Beautiful DIY Faculty Formal Costume Stitching Patterns for Unforgettable Proms and Weddings – Stitching -
Pingback: Friday Sample Cambria Duster – Stitching -
Pingback: Slip Dress Sewing Patterns: Your New Go-To Wardrobe Staple ⋆ Hello Sewing
Pingback: 25 Stunning Slip Dress Sewing Patterns for Effortless Elegance and Glamour – Sewing
Pingback: 25 Stunning Slip Dress Sewing Patterns for Effortless Elegance and Glamour – Sewing – cybercraftworks – Cyber Crafts
Pingback: 25 superbes patrons de couture de robes nuisettes pour une élégance et un glamour sans effort – Couture – ETHAN PIKE