
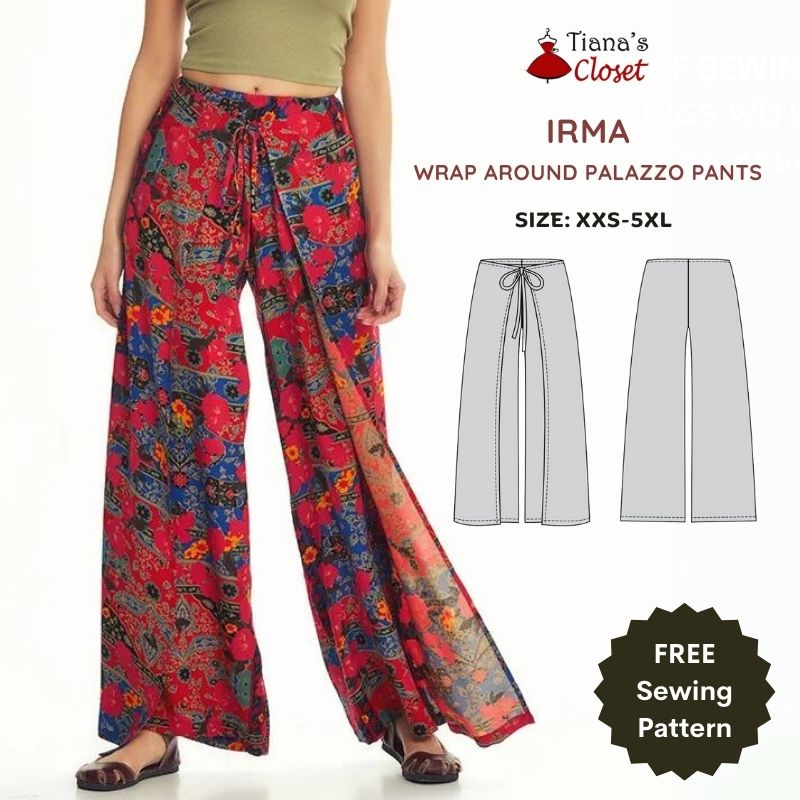
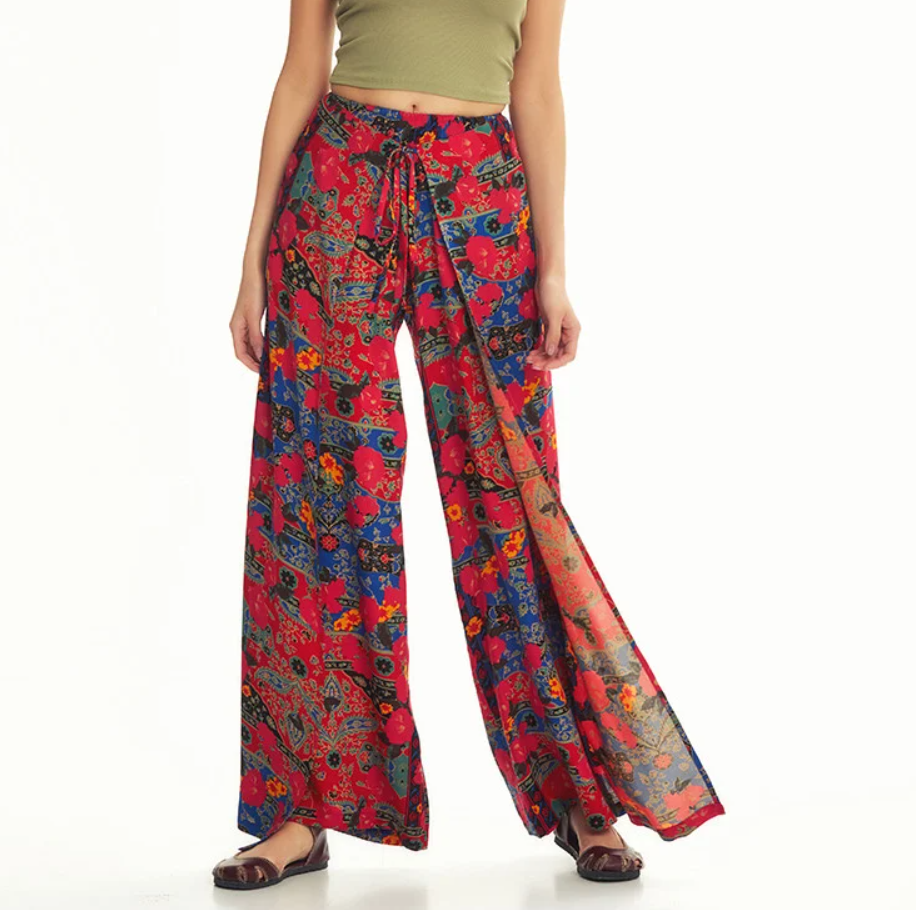
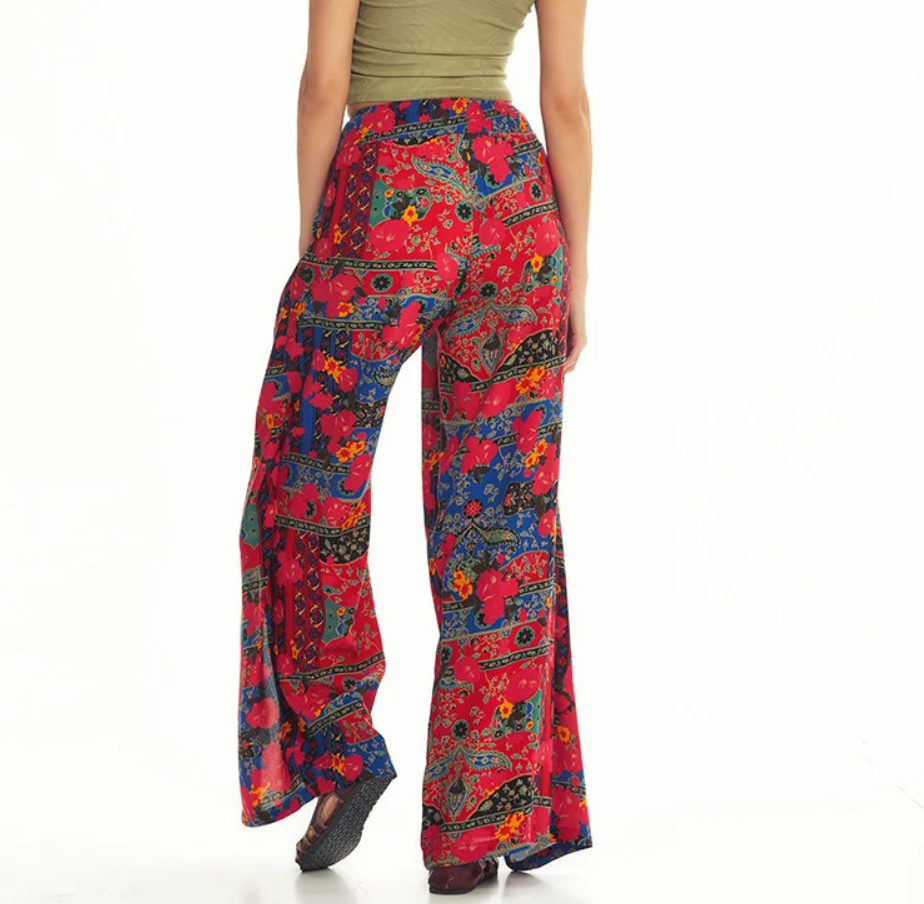
This design has been popping up in my Instagram feeds for a while now, and I finally overcome my laziness and created the pattern for it – the Irma wrap around palazzo pants.
This pattern is so simple that it can be done without much sewing skills: there are only a handful of seams to sew! Great for beginners and experienced sewers alike!
This is the details of the design:
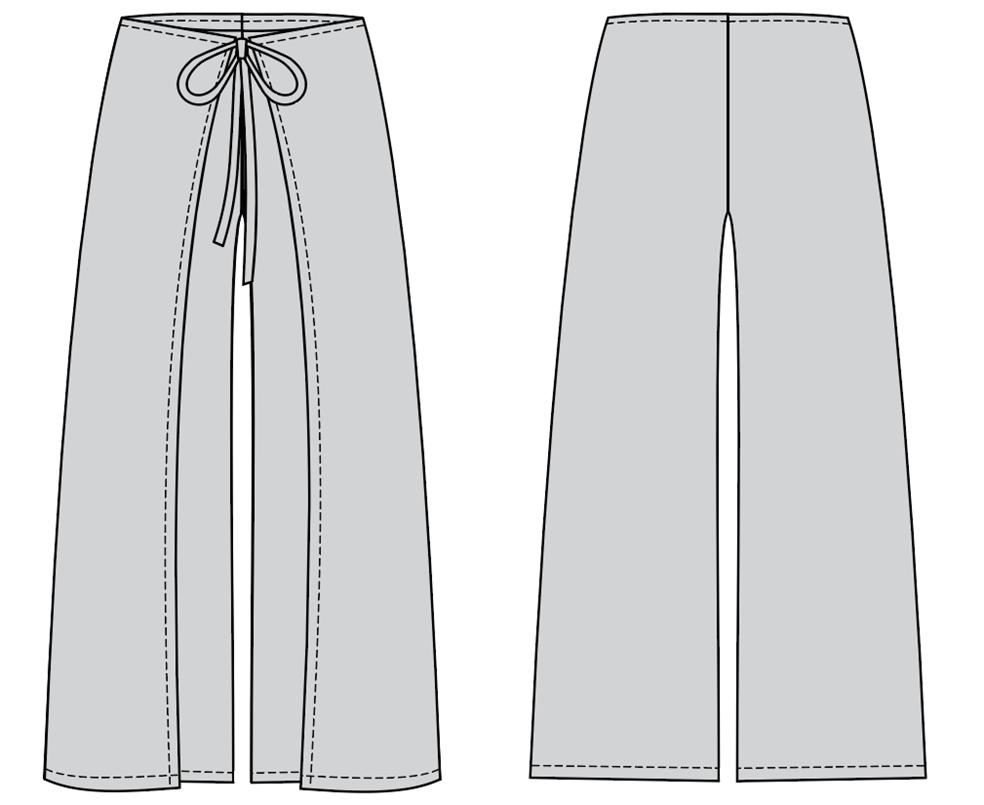
TECHNICAL SKETCH
SEWING INSTRUCTION
PRINTING PATTERN
Make sure you print your patterns at actual size (100% scale or None) and on single sides of plain paper. Verify that the print-out size is to the correct scale by measuring the test scale on the first page.
Trim top and/or right margin of the pages where you see the scissors symbols. In the center of each page, the number of rows and columns is printed. Construct layout pages according to these marks (for example, page marked 2C is in the second row and in the third column). Align pages using margins and tape or glue together.
PREPARING AND CUTTING FABRIC
What you’ll need:
- Printed and cut out pattern.
- Fabric of your choice. This design is for WOVEN fabric (cotton, linen, gauze, etc.)
- Sewing/serger machine, or needle and threads.
Because most fabric will shrink after the first time washing and ironing, it is necessary to pre-wash your fabric. This does not only stop future shrinkage but also removes excess dyes and chemicals from the production process.
The fabric estimation is for pre-washed, pre-shrunk fabric. You may need to account for the shrinkage when using fabric that is not prepared.
| Size | XXS | XS | S | M | L | XL | XXL | 3XL | 4XL | 5XL | |
| Fabric requirement (120CM/47″ fabric width) | cm | 240 | 240 | 240 | 240 | 240 | 241 | 242 | 243 | 244 | 245 |
| in | 96 | 96 | 96 | 96 | 96 | 96.4 | 96.8 | 97.2 | 97.6 | 98 | |
If you choose to use fabric of different widths, color blocking, or mixed media, the amount of fabric needed will vary. It will depend on the selected pattern size, the width, and design of the fabric you plan to use. If you want to be sure, print all the paper patterns and lay them out at the width of fabric you plan to use. Measure how much fabric you will need. Don’t forget to account for pieces that need to be cut multiple times and pieces that are cut on the fold.
Prepare and cut fabric
Lay out your pieces according to straight of grain as marked on the pattern pieces. Some pieces will be cut on the fold, the corresponding edge will then be marked with a fold mark. Kindly pay attention to notes regarding type of fabric and quantity of required pieces on a block. For example, [Lower Skirt, cut 1 on fold] on a pattern piece means that you need to cut 1 piece on the fold, or [Collar, cut 2 self + 1 fusible interfacing] means you need to cut 2 mirrored pieces of self fabric and 1 piece of fusible interfacing.
Place the sewing pattern pieces on the fabric and use weights to keep them from shifting. Mark the outlines with a water-soluble or heat-erasable marker. Make sure to mark and transfer all notches and other design features such as pleats, pocket position etc. from the pattern piece onto your fabric. When sewing the garment, pay attention to notches, they must match up.
The pattern pieces are cut as follows:
- Pants: cut 2 mirrored pieces
- Tie Strap: cut 4 pieces

Seam allowance:
- Hem: 2.5cm (1”)
- Vertical and waist seam: 2cm (3/4”)
- Crotch seam: 1cm (3/8”)
- Seam allowance has already been included in the pattern pieces. Please cut the pattern as is and use the above-mentioned seam allowance when constructing the garment.
SEWING INSTRUCTION
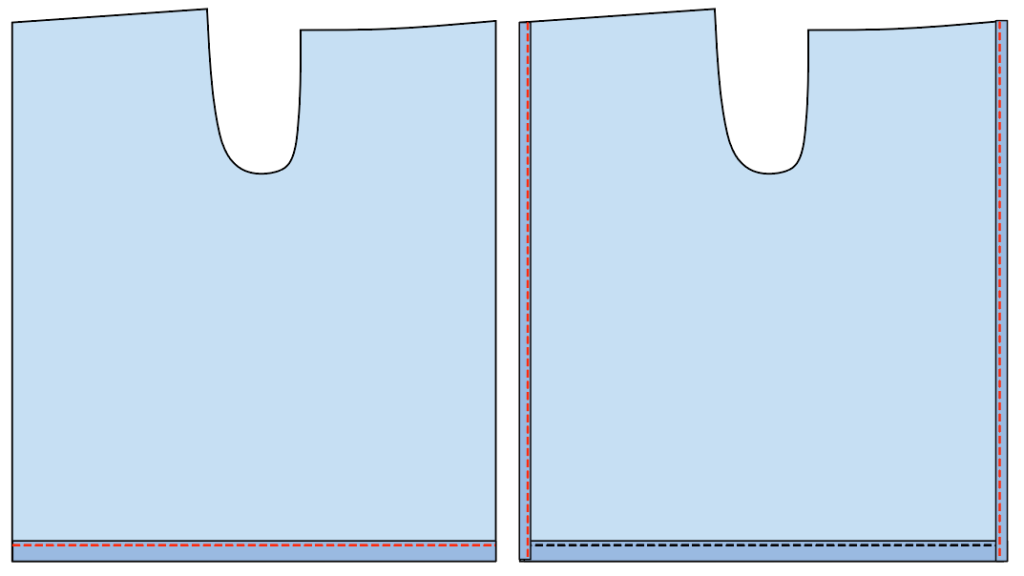
Fold 0.5cm (1/4”) of the bottom edge of Pant piece to the wrong side of fabric, then continue to fold another 2cm (3/4”) to the same direction and topstitch close to the edge to finish the pant hem.
Fold the vertical edge twice, each time 1cm (3/8”) to the wrong side of fabric and topstitch to finish the vertical edge.
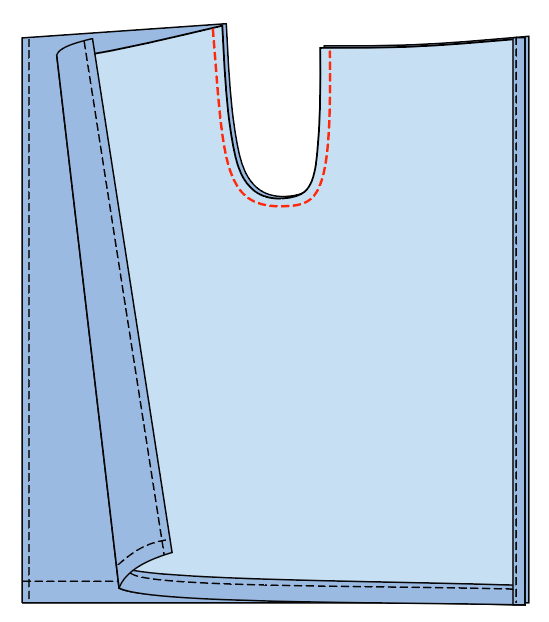
Place two Pant pieces right sides together, match the crotch seam and stitch. Neaten seam allowances together using serger/zigzag stitch. Press toward one side.
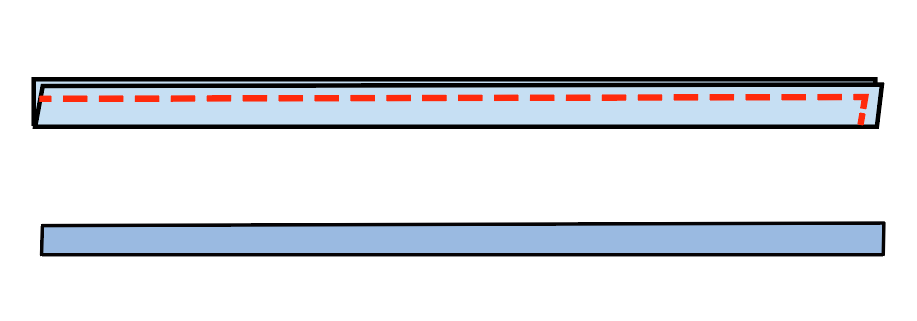
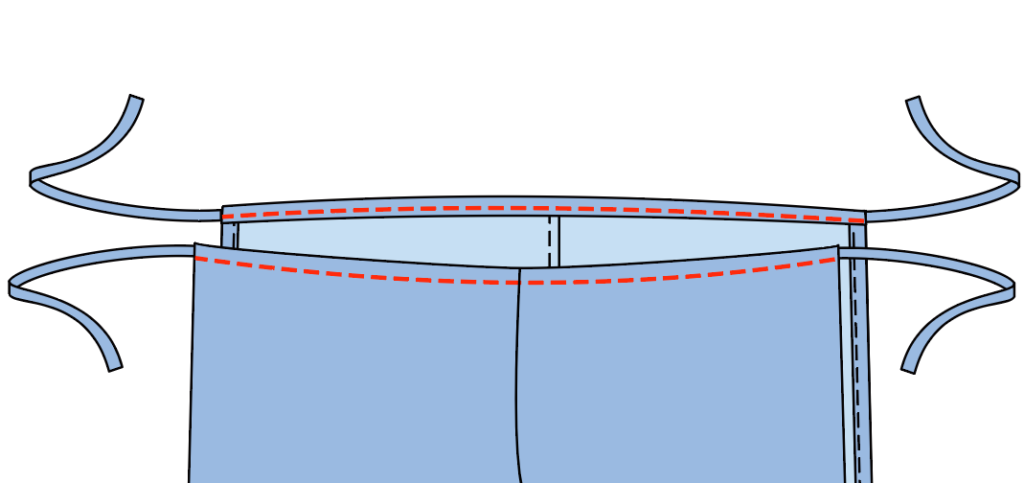
Fold the Tie Strap in half lengthwise and stitch around leaving one short end as shown. Clip the corner and turn the tube right side out and press.
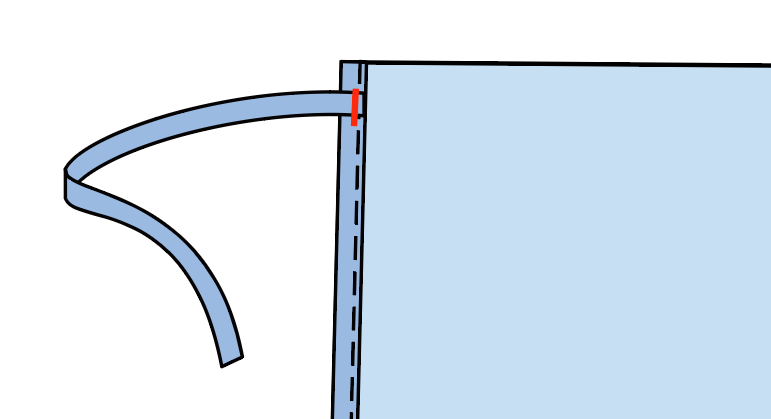
Place the unfinished end of the Tie Straps at the top corner of the garment, 1cm (3/8”) below the top edge. Make sure to place it on the wrong side of the fabric. Stitch to attach. Repeat to attach all 4 tie straps to 4 corners.
Fold the top edge of the garment twice to the wrong side of fabric, each time 1cm (3/8”). Topstitch close to the inner folded edge as shown to finish the garment.
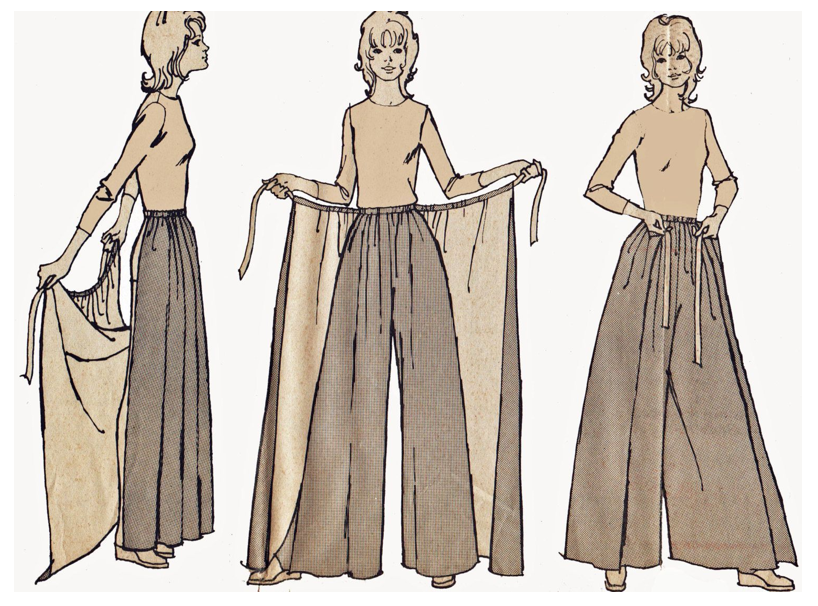
And this is how to wear the Irma pants:
Download here: https://tianascloset.com/index.php/product/irma-wrap-around-palazzo-pants/
Happy sewing! And don’t forget to share your project on my Facebook page: Tiana’s Closet Sewing Patterns or tag me on Instagram #tianasclosetsewingpatterns, I will be thrilled to see the garment in real life!
Pingback: Sewing Pattern Wrap Around Pants - Sewing Pattern
Pingback: 11 Palazzo Pants Free Sewing Patterns