

I have been using this method to sew elastic waistband for many projects. I have seen this in many mass produced garments and must admit it is the quickest and easiest way to sew elastic waistband. It is not only easy but also a great way to keep the elastic from being twisted when you pull it up (my 4 year old son does this all the time with inserted, not sewn in elastic). The only downside of this is you cannot adjust the length of elastic without ripping the whole thing off.
This tutorial shows you how to sew this fold in attached elastic waistband:
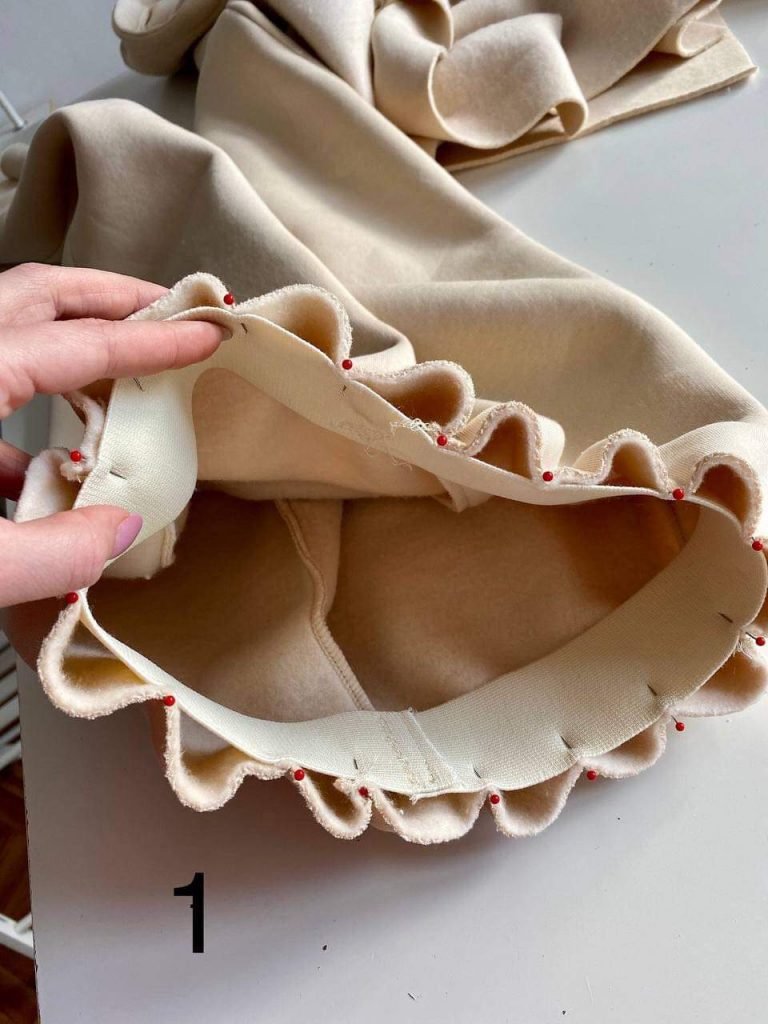
Step 1: After you finish joining the pieces of the garment, pin the elastic (in this tutorial it’s a 1 inch wide elastic with two ends already sewn together) to the INSIDE of garment. Mark evenly spaced points on both garment and elastic before pinning to make sure the gatherings are distributed nicely.
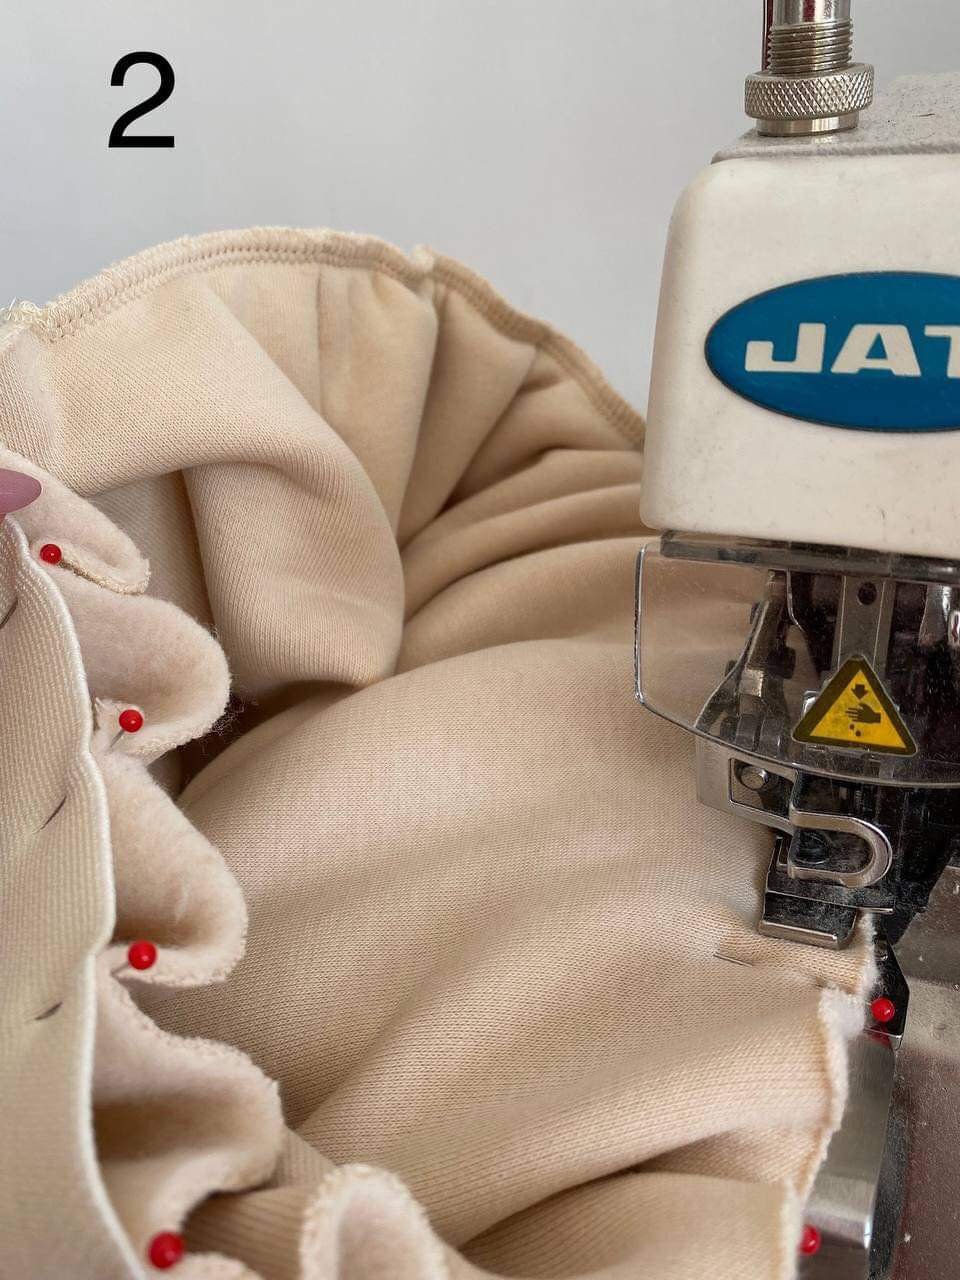
Step 2: Sew the elastic to the top edge of the garment. Pull the elastic while sewing to match the fabric. I am using a serger but you can sew with a straight stitch on your machine.
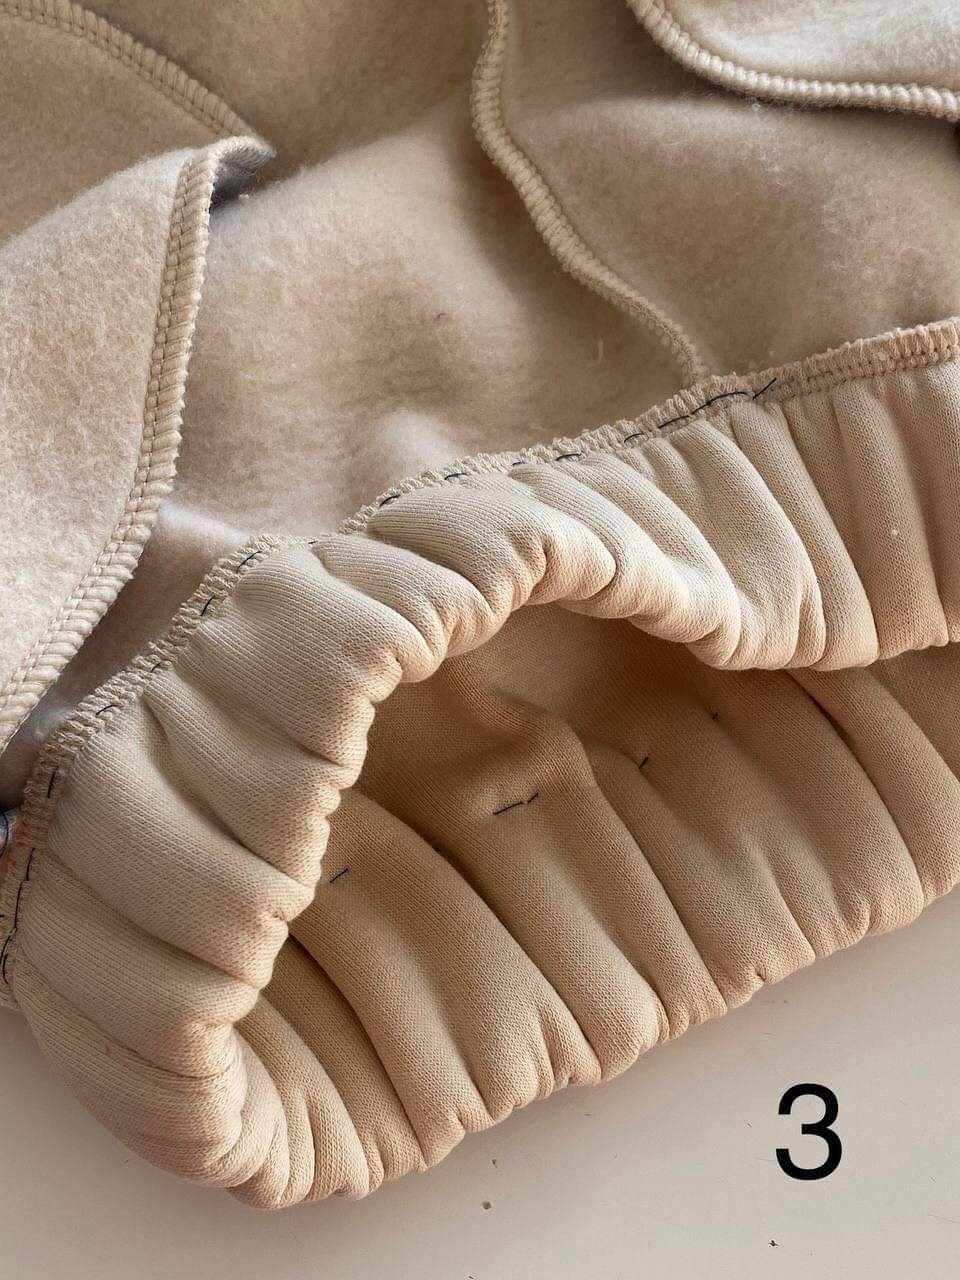
This is how it looks after sewing.

Step 3: Fold the edge of the garment together with the elastic inward so that the elastic is covered by the main fabric. Baste if needed. Now the elastic is covered between 2 layers of fabric. The width of elastic is also the width of the waistband.
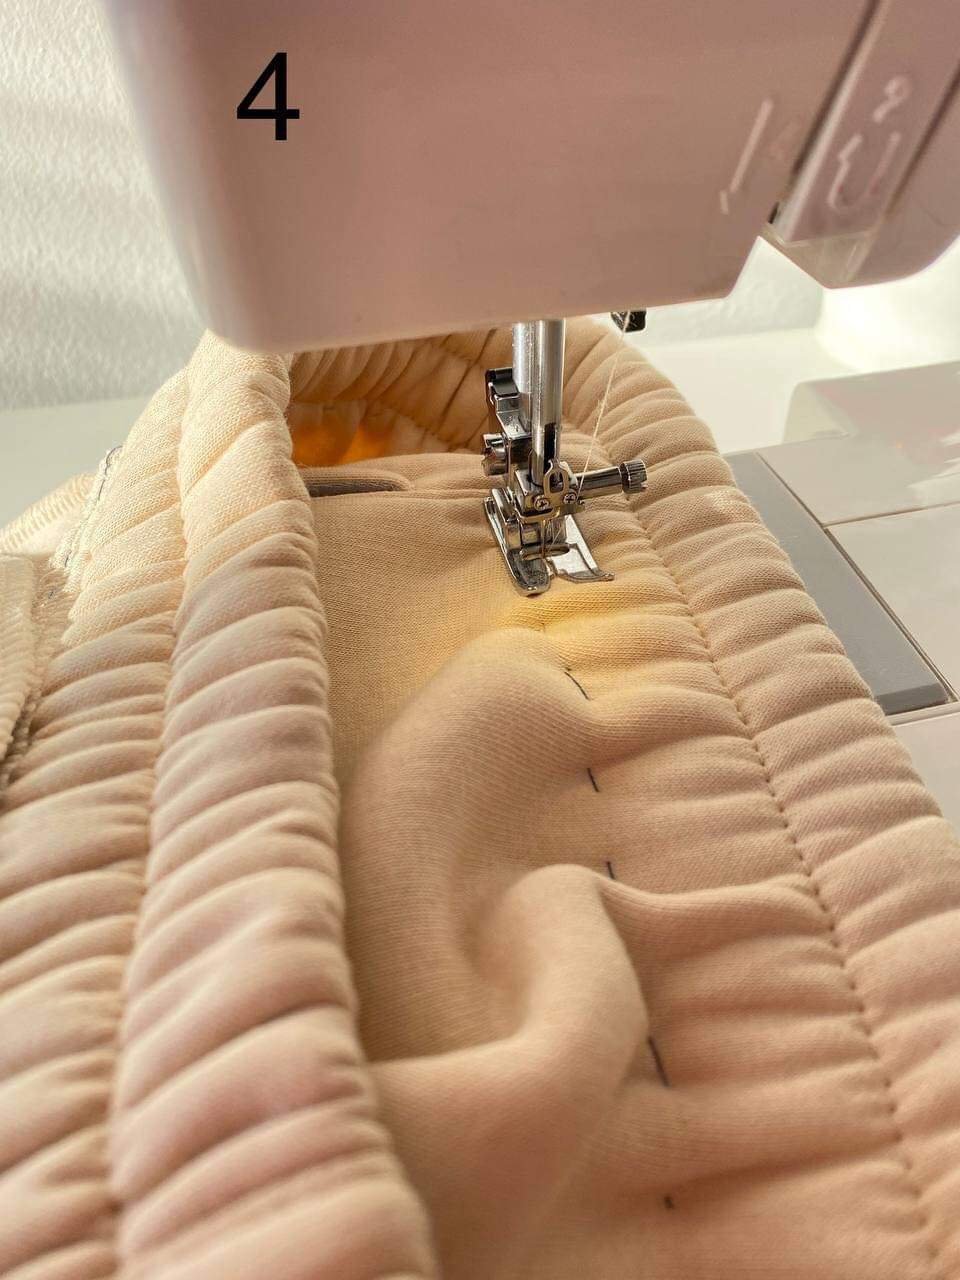
Step 4: Pull the fabric and elastic straight and sew at the middle of the elastic. Sew another parallel line along the basting line. And you’re done!
Finished product:

Nice and clean huh? The besting is that it won’t twist 🙂