
This is yet another item in the September collection – I am sooo behind schedule with the Claire dress not done yet. Next month I will be even busier than this month, and I think I won’t have much time to invest in pattern making that I am addicted to.
OK, enough with whining. I am introducing the Amy bat-wing top pattern, which is initially sketched with the Sarah skirt.
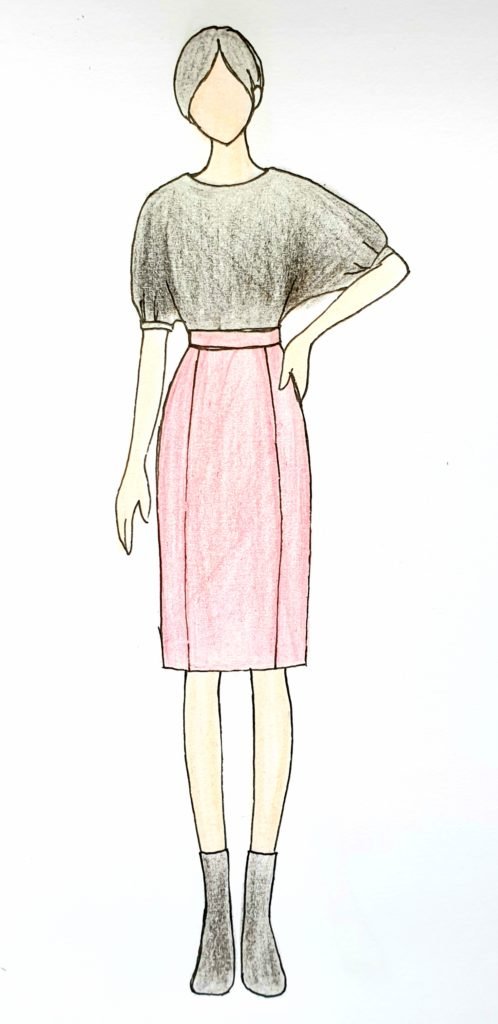
And this is it in 3D simulation. I am really happy with the way it turns out to be in reality:


Do you think that this pattern is quite versatile? You can make it with thin or thick fabric, and the prints are all up to you!
This Amy top pattern is created in layered PDF format.
The pattern is made using layered PDF, please check for your desired size before printing so you won’t waste your paper. If you still do not know how to print a layered PDF, please check for the instruction here.
You can print this using your home printer and A4/Letter paper. I calculated the printing area so that you will be able to use either type of paper to print the pattern out perfectly. Always print the first page first and check with the test square if you are printing at the right scale before you print out the whole pattern.
Cutting instruction:
After taping down all the pages following the instruction, the pattern pieces will look like this:

There are 5 pattern pieces to be cut as follows:
A. Front – 1pcs
B. Back – 1pcs
C. Cuff – 2pcs
D. Front facing – 1pcs + Fusible interfacing – 1pcs
E. Back facing – 1pcs + Fusible interfacing – 1pcs
You can replace Front facing and Back facing with bias tape. I recommend you to use bias tape when you choose knit fabric, it will help you to get a more secure and flatter neckline.
Sewing instructions:
1. Apply fusible interfacing to the Front and Back Neckline Facing pieces.
2. Place Front and Back pieces right sides together. Match the shoulder/upper arm seams and stitch. Match the side and under arm seams and stitch.
3. Fold the Sleeve Cuff in half vertically, right sides together, and stitch to create a loop. Press seam open. Fold the Sleeve Cuff in half again, right side facing out, matching the raw edges.
4a. If you are using woven fabric, gather the sleeve bottom to match the width of the sleeve cuff. Pin the sleeve cuff to right side of the sleeve opening, match the seam of the cuff with the underarm seam, and the notch on the sleeve cuff with the upper arm seam. Redistribute gathers evenly and stitch the sleeve cuff to the sleeve.
4b. If you are using knit fabric, just pin the sleeve cuff to the sleeve opening, match the seam of the cuff with the underarm seam, and the notch on the sleeve cuff with the upper arm seam. Stitch the sleeve cuff seam. Stretch the sleeve cuff as you sew to match the width of the sleeve opening.
5. Place Front and Back Neck Facing pieces right sides together and stitch the shoulder seam. Place the neckline facing on the right side of main garment and stitch the neckline. Clip the seam allowance at the curve to release tension, and understitch the seam allowance to the facing piece.
6. Turn neckline facing to the inside of garment. Tack the shoulder seam allowance of the neckline facing to the shoulder seam allowance of the main garment to prevent the from turning out.
This is the link to download this pattern: Amy bat-wing top (XXS to 5XL)
Happy sewing!
Tiana
merci beaucoup pour tout ces patrons !
Je vais faire ce modèle aujourd’hui , encore merci .
Elodie
Pingback: Cheshire Tops | Hopefully Creative