

Have you ever find a beautiful pattern that you would love to sew? I bet many of us have. And how many people find the available sizes are just not for you? I bet most of us. Patterns are made with standard measurements, and just like how they say ‘Standard person does not exist’, we may find that one size fits well at the bust, but is too tight at the waist and hips, or maybe it fits at the hips and bust, but is too tight at the abdomen.
This problem exist with Tiana’s Closet patterns, too. And although I hate it so much, I cannot do anything about it. The best thing I can do for you is to show you how we can adjust any ready-made pattern to your own size.
First of all, choose the size closest to your bust measurements. Why choose the bust? Because there are darts and princess seams, and other complicating things around this most important part of a dress, and you won’t like to adjust too much at this part.
Check your measurements with the size table and see how they differ from the ‘standard’ measurements. Note them down. In the example below, I am adjusting the pattern of a basic sheath dress for a woman named Maya with the measurements like this: Bust 95cm, Waist 86cm, Hips 116cm. You can see that her bust measurement is closest to a size L of Tiana’s Closet pattern. So we will choose size L to print out. Of course, you will need to tape the pages together after printing.
Now let’s pick up the pen and do some calculation:
| Standard size L | Maya’s measurements | Difference in measurement | Difference divided by 4 |
| 96 | 95 | -1 | -0.25 |
| 80 | 86 | +6 | +1.5 |
| 104 | 116 | +12 | +3 |
After you get the numbers, you can go on with rulers and pencil. This requires you to draw directly on the pattern, so transfer it to a larger piece of paper in case you need to increase the measurements.
This is the size L pattern after printing and taped together and transferred to a new piece of paper.
ADJUSTING THE BACK PIECE
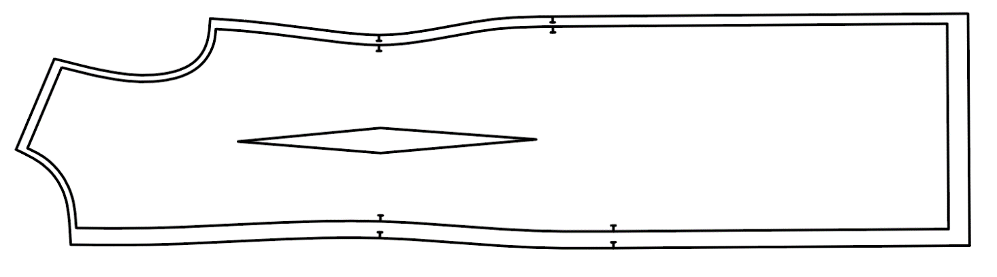
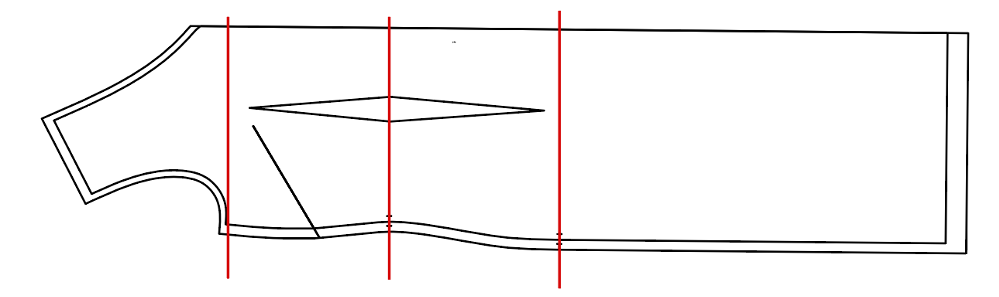
You will notice the notches at the waist and hips of the pattern. Draw horizontal lines from these notches across the pattern. Draw the lines through the center of waist darts and bust dart. It will look like this after drawing:

Now let’s look at the table you made at the beginning.
– The bust part can be kept as-is, or reduce 0.25cm. I suggest you to keep it as-is because 0.25cm more ease will not affect the silhouette of the garment.
– The waist part needs to be increased 1.5cm.
– The hip part needs to be increased 3cm.
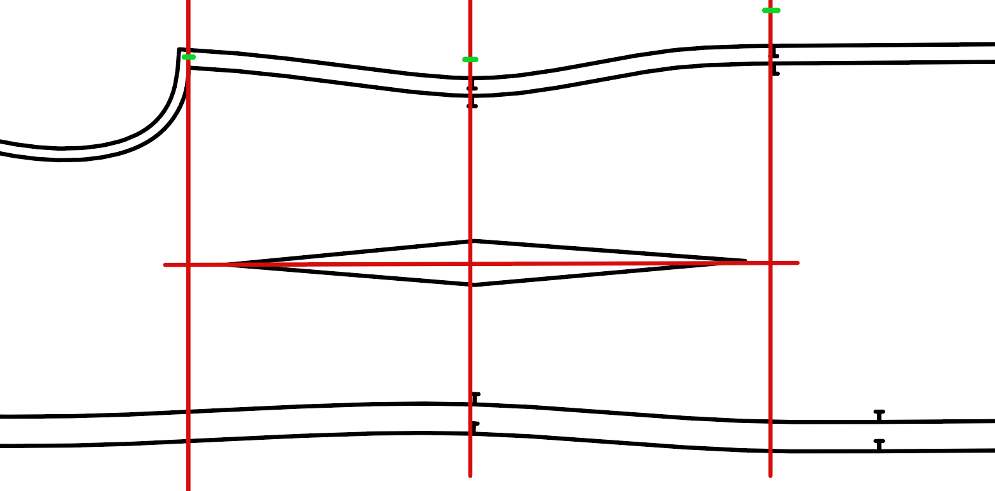
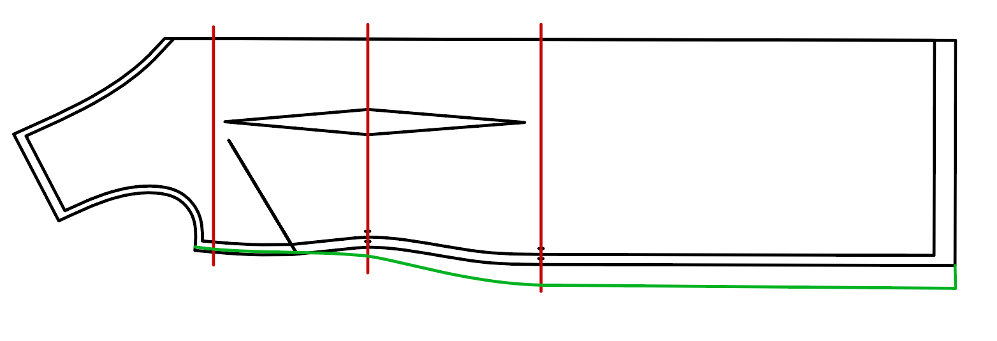
Measure the reduction or increment of each position from the edge of the pattern and mark on the horizontal lines as shown below (I zoomed in so you can see the green marks on the lines).
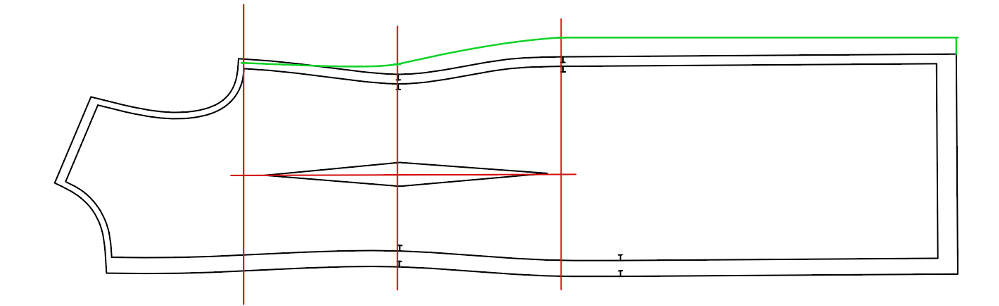
Draw new side seam line connecting the newly adjusted points (the green lines).

Smoothen the curve of the side seam and draw parallel line from the new hip point to the hemline. And you get the new pattern for your own measurements.
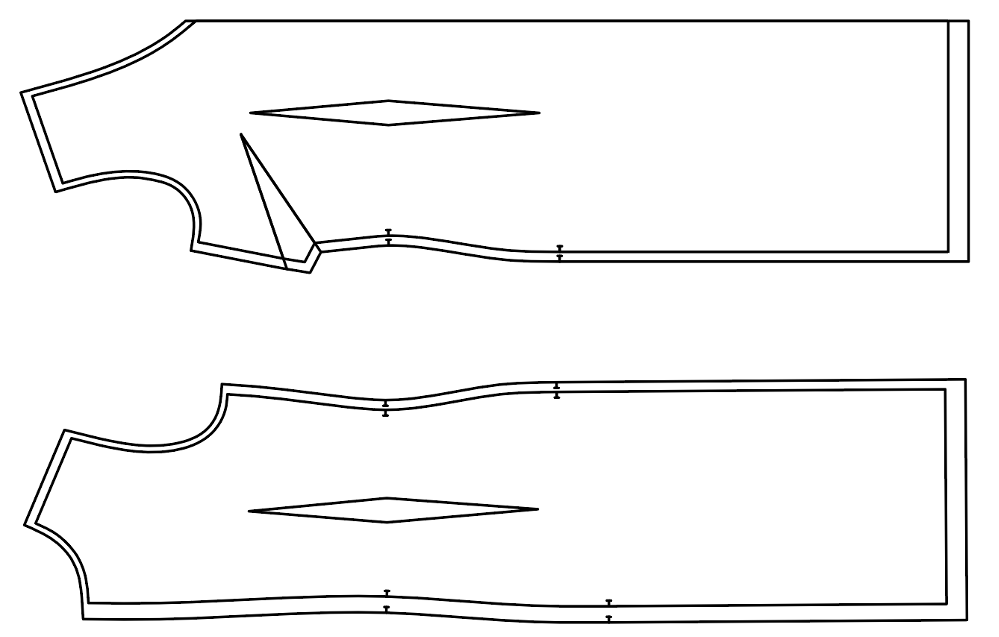
ADJUSTING THE FRONT PIECE
The front piece is a bit trickier than the back because of the bust dart. You will have to close the dart before making any changes to the side seam in order not to make the dart legs uneven.
After closing the bust dart and draw the horizontal lines (the line is a bit curved at the bust, but it can be done easily), the side seam will look like this:
You can do the rest just like how you adjust the back piece.
Then open the bust dart. Redraw the bust dart legs and center. Now you get the newly adjusted front piece.

Voila! You have done a great work adjusting the pattern to fit your own measurements. This method can be done with many types of patterns. Just compare your measurements with the size table provided by the producer and do some simple calculations, and the pattern will fit you so much better than the ready made ones!
Hope you enjoy sewing just like I do.
Love,
Tiana
is there any pdy pattern for this tutorial pls? thank you very much
Pingback: Making (digital) regular patterns work for petites – my simple way – Tiana's Closet